Active Directory & Domain Services Lab

Overview: A homelab environment for emulating an enterprise Active Directory and Domain Services configuration. Aspects of the enterprise environment that are touched on in this project include user management, Group Policy, DNS, DHCP, and OUs to replicate real-world corporate IT infrastructure
Core Components:
- Domain Controller
- Group Policy
- Organizational Units
- DNS / DHCP
Software used
- Oracle VirtualBox
- Windows Server 2022
- Windows 10/11 clients
Network Setup
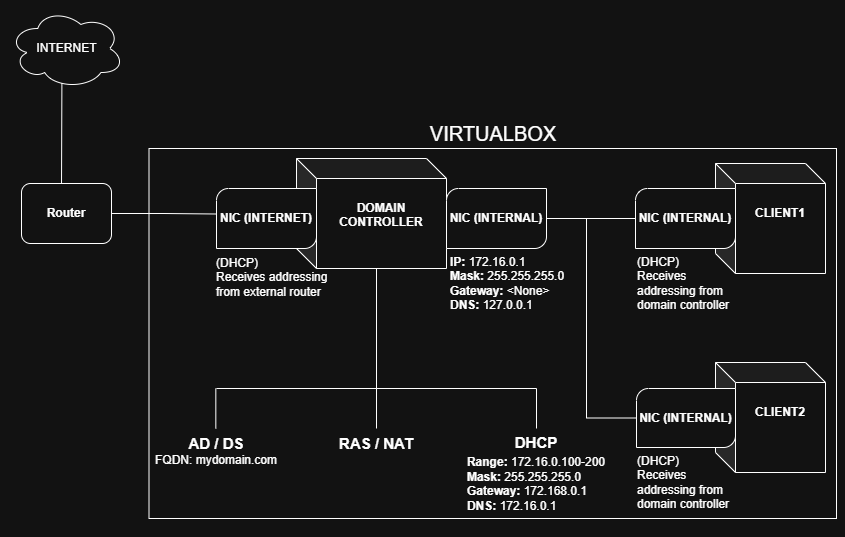
Three virtual machines were used in this project, one as the domain controller and the others as Windows clients. The domain controller has two virtual network adapters for the internal network and external network access.
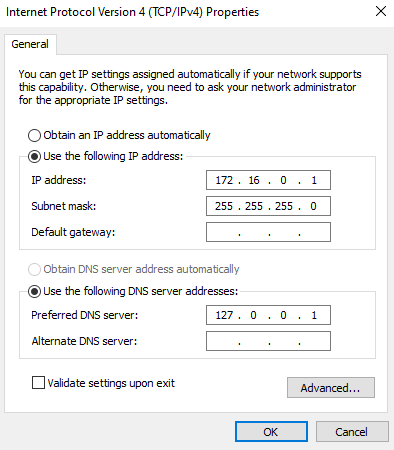
The purpose of the internal network interface card to listen and respond to DHCP client requests for the the DHCP server. To do this, we configure the NIC to have a static IP address within our scope (see diagram above).
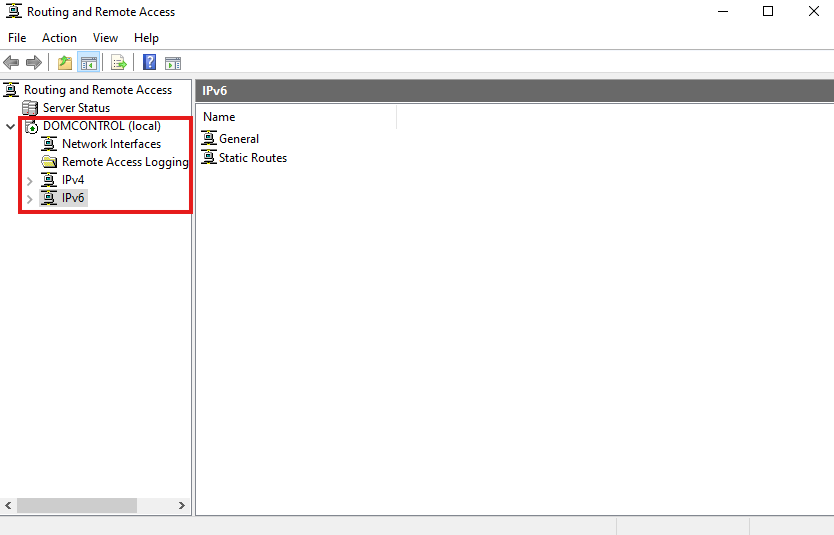
Next, we need to configure the external NIC, which will allow the internal network to access the internet. In the Server Manager, we enable routing + remote access features and configure the external NIC as a public interface (internet access) that uses NAT. The "Routing and Remote Access" window should look like this after the process is complete:
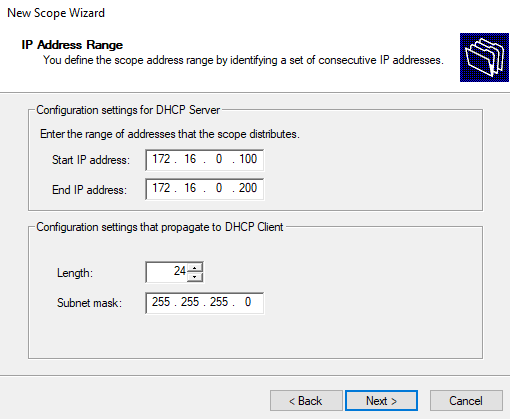
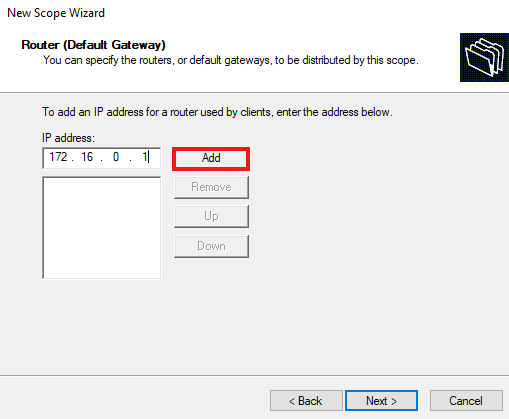
Now we install DHCP server functionality on our domain controller and set a new scope for IPV4. For the scope, we set the IP range and subnet mask described in the diagram.
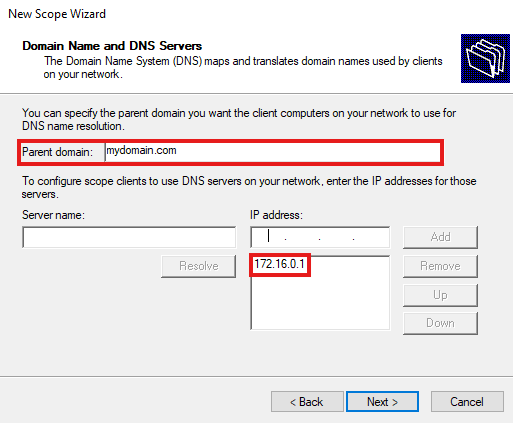
Next, we set the default gateway for internal clients as the IP address of the domain controller's internal NIC. Then, we set the domain controller as the parent domain for the DNS server and activate the scope.
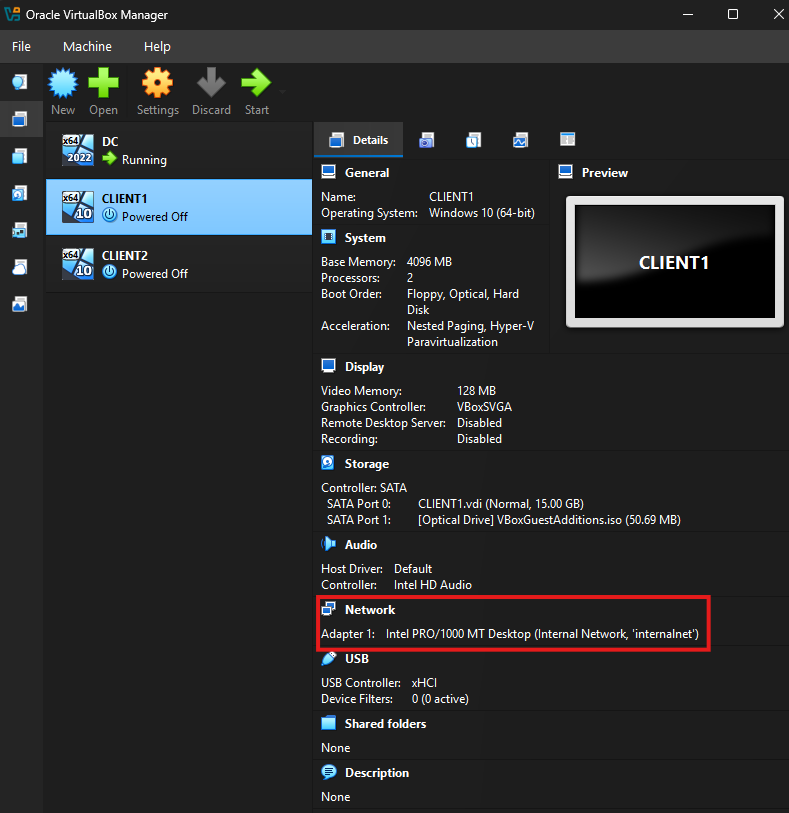
Client VMs
With our network configuration is finished, it's time to create some client VMs and join them to the domain. These systems will reside in the private network so they will be configured to use internal NICs that don't have direct access to external networks.
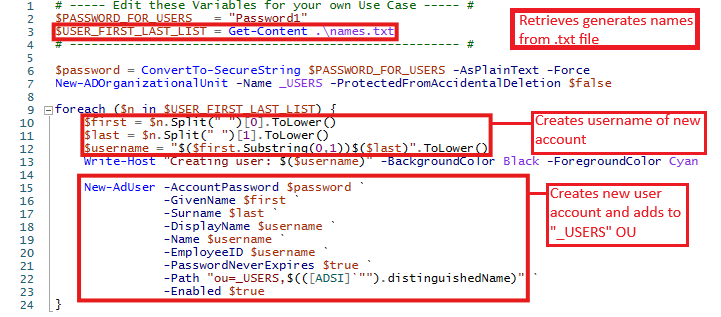
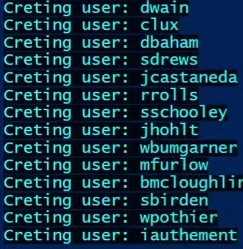
Time to make some user accounts and put them in an Organizational Unit (OU) for use with these client VMs! In the context of this project, these accounts would be the employeesat the company. I automated the creation of a bunch of these accounts using a PowerShell script sourced from a public GitHub repository (joshmadakor1/AD_PS). The script retrieves names from a plain text file of randomly generated names, creates an account with the username starting with the first letter of their first name followed by the last name (e.g. ' "Lily Borchardt" has username "lborchardt"), and places them in the "_USERS" OU.
Here is the script:
The output of the script when run:
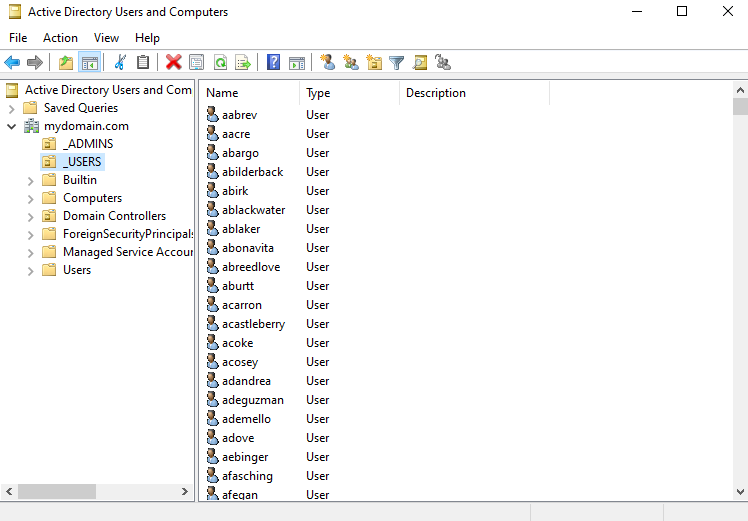
New "_USERS" OU populated by new accounts:
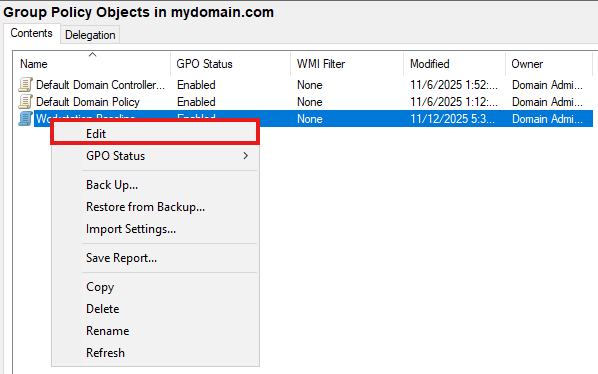
After we've created our group of users, it's time to apply Group Policies to this OU. We'll create a new Group Policy Object called "Workstation Baseline" and configure our desired policies.
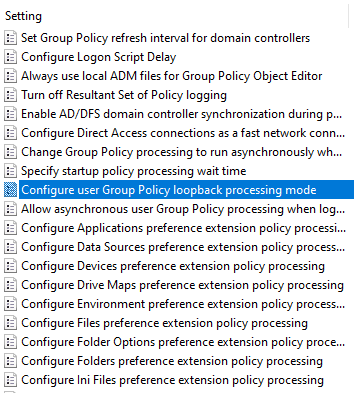
These are the policies I've applied to our new "Workstation Baseline" GPO:
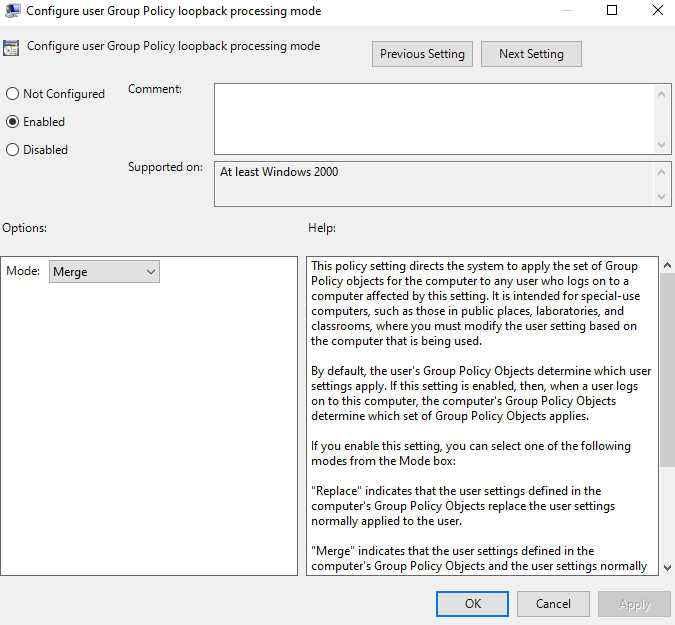
- Group policy loopback processing mode
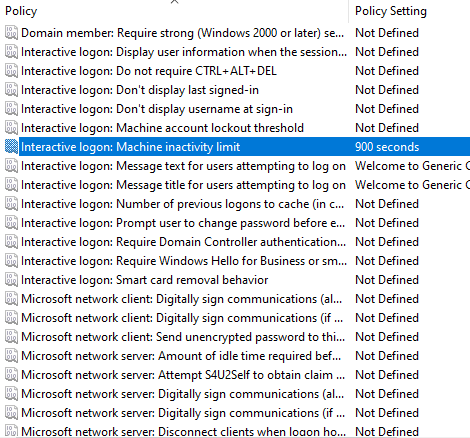
- Machine activity limit
- Block USB storage devices
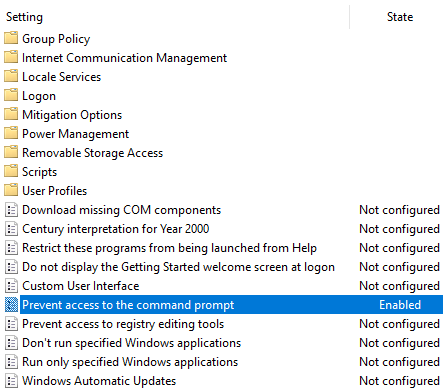
- Prevention of access to command prompt
Group policy loopback processing mode applies policies based on which machine a user is logged into. This allows us to standardize across workstations.
Machine activity limit logs a user off after a certain threshold of inactivity, important for situations such as an employee stepping away from the computer for an extended period of time.
Blocking USB storage devices from interfacing with a machine serves as a form of device hardening against internal and external threats.
Employees outside of an IT department generally do not need to access to the command prompt so we disable access to it.
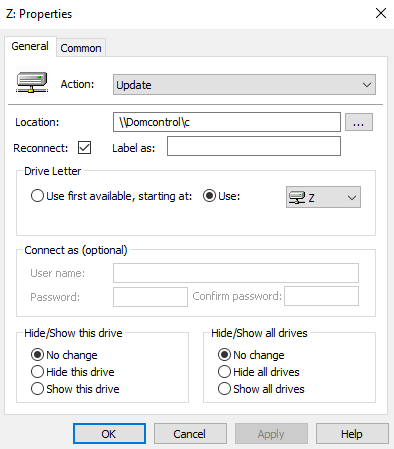
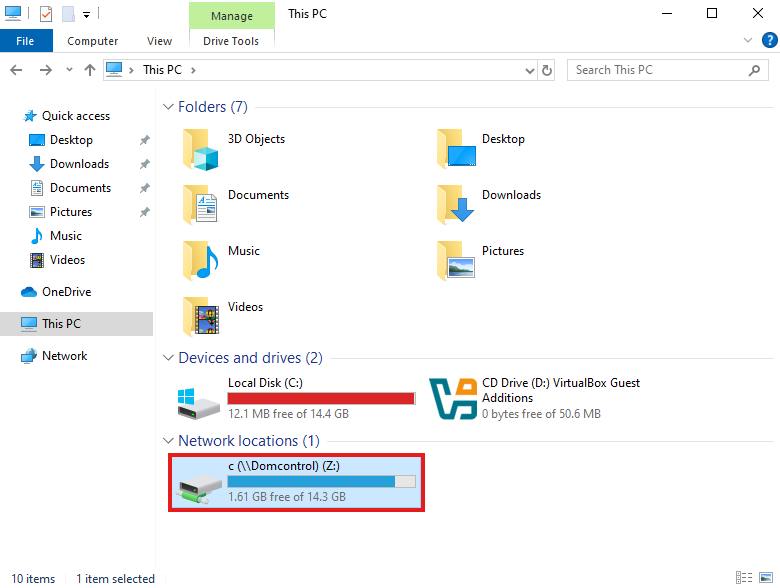
Creating a mapped drive
Mapped drives are important because they centralize file storage for quick access to remote files from machines. We'll create one here and name it the "Z:" drive. Since this lab is running on my home machine, I have limited disk space for creating a separate drive. Instead, I'll link the mapped Z: drive to the C: drive of the virtual machine using its Universal Naming Convention (UNC) path.
Now, our client VMs can access this shared drive which helps streamline collaboration on projects!
We're done! Now we have a basic Active Directory enterprise setup.